Cent$ible Nutrition News • May 2020 • Volume 23 | Number 3
Download this newsletter!
Growing your own food can be one way to add more fresh produce to your meals and keep grocery bills lower. Container gardens are a great option for many reasons. They can be moved inside and outside as the temperature and weather changes; they may decrease issues with weeds and pests; and they can be more manageable. The steps below will help you get started.
- Think about location. Vegetables need sunlight, consistent water, and wind protection. A sunny porch, windowsill, or driveway may be a good location.
- Pick your plants. Think about what vegetables you and your family like and the size of the containers you have. Container size limits what can be grown.
- Pick your container. Containers should be made of safe materials. Milk jugs, buckets, pots, and wood or metal boxes may all work, depending on what you want to grow. Containers also need drainage holes in the bottom.
- Match container size to vegetable. Certain vegetables need certain amounts of space to grow well. Also, think about moving the containers. The bigger the container, the heavier it will be.
- 1/2-2 gallon sizes: Lettuce, spinach, cilantro, chives, and parsley
- 2-3 gallon sizes: Chard, beans, radishes, beans, rosemary, basil, and oregano
- 4-7 gallon sizes: peppers, beans, tomatoes, eggplant, squash, cucumbers, carrots, potatoes, and beets
- Plant seeds. Follow directions on the seed packets. Seeds can be planted directly into a container or started in smaller pots that can be transferred to larger pots once they are several inches tall. Seeds can be planted outside or started earlier indoors. If starting seeds inside, make sure they get enough light. Try placing them in a sunny windowsill.
- Move plants outside. Gradually transition plants from indoors to outdoors. Place plants outside for several hours during the day and then slowly increase the amount by several hours each day. Plants can be moved outside when it is at least 60°F. Bring plants inside at night if temperatures drop below 55°F.
- Water and tending. Try to water plants daily, usually in the morning, so they have enough water to get through the heat of the day.
- Harvest. Different plants will be ready for harvest at different times. Check the seed packets to see how long until they will be ready. Harvest in the early morning. Cool and wash visible dirt from your harvest.
Written with Brian Sebade, University of Wyoming Extension Educator
Download this newsletter!
Growing your own food can be one way to add more fresh produce to your meals and keep grocery bills lower. Container gardens are a great option for many reasons. They can be moved inside and outside as the temperature and weather changes; they may decrease issues with weeds and pests; and they can be more manageable. The steps below will help you get started.
- Think about location. Vegetables need sunlight, consistent water, and wind protection. A sunny porch, windowsill, or driveway may be a good location.
- Pick your plants. Think about what vegetables you and your family like and the size of the containers you have. Container size limits what can be grown.
- Pick your container. Containers should be made of safe materials. Milk jugs, buckets, pots, and wood or metal boxes may all work, depending on what you want to grow. Containers also need drainage holes in the bottom.
- Match container size to vegetable. Certain vegetables need certain amounts of space to grow well. Also, think about moving the containers. The bigger the container, the heavier it will be.
- .5-2 gallon sizes: Lettuce, spinach, cilantro, chives, and parsley
- 2-3 gallon sizes: Chard, beans, radishes, beans, rosemary, basil, and oregano
- 4-7 gallon sizes: peppers, beans, tomatoes, eggplant, squash, cucumbers, carrots, potatoes, and beets
- Plant seeds. Follow directions on the seed packets. Seeds can be planted directly into a container or started in smaller pots that can be transferred to larger pots once they are several inches tall. Seeds can be planted outside or started earlier indoors. If starting seeds inside, make sure they get enough light. Try placing them in a sunny windowsill.
- Move plants outside. Gradually transition plants from indoors to outdoors. Place plants outside for several hours during the day and then slowly increase the amount by several hours each day. Plants can be moved outside when it is at least 60°F. Bring plants inside at night if temperatures drop below 55°F.
- Water and tending. Try to water plants daily, usually in the morning, so they have enough water to get through the heat of the day.
- Harvest. Different plants will be ready for harvest at different times. Check the seed packets to see how long until they will be ready. Harvest in the early morning. Cool and wash visible dirt from your harvest.
May's Feature Recipe
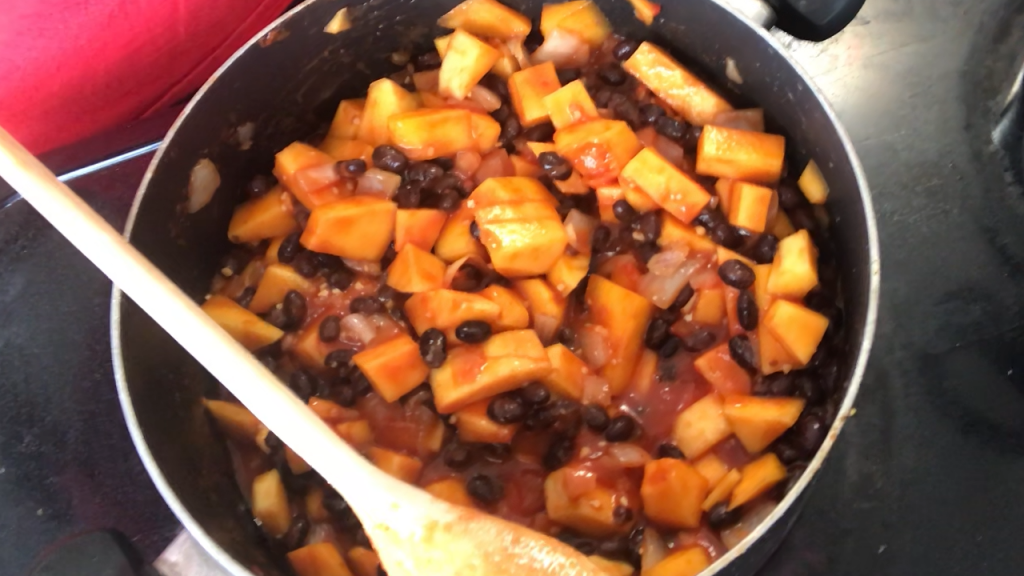
Black Bean & Butternut Squash Stew
This hearty stew is a perfect way to add some veggies to your day. Using beans keeps the cost low and the protein high.
Click the link to watch the video and get the recipe!